
The Linnæanne Brother shivered in the faint light of luciferin lamps that illuminated the moss covered underworld around him. He looked around in the labyrinthine underworld of the Gheal. 3rd Moon. Gate Moon. He had already read the old scriptures. They described how the long-gone forests of Terra, now only the stuff of myths, were living, sentient beings — a fluid, changing web of purposeful lives dependent on each other. How they communicated with each other above and below ground.
+++
After a series of smaller skirmish battles, deciding who were allies and enemies, the final cataclysmic battle on the Gate Moon of Gheal, 3rd Moon, was to decide the fate of the Thorn Moons themselves!
The final battle was fought out on two massive tables simultaneously illustrating how the Crataegus Legion and Green Mechanicvm together with their allies, the Blood Red Tide of the Red Corsairs and the elusive Alpha Legionaires, were defending the Thorn Moons on two fronts at the same time.
We cant wait to share the story from these epic battles in the next series of posts but for now here you have a short introduction to the two tables illustrating the terrain of the Gate Moon itself!
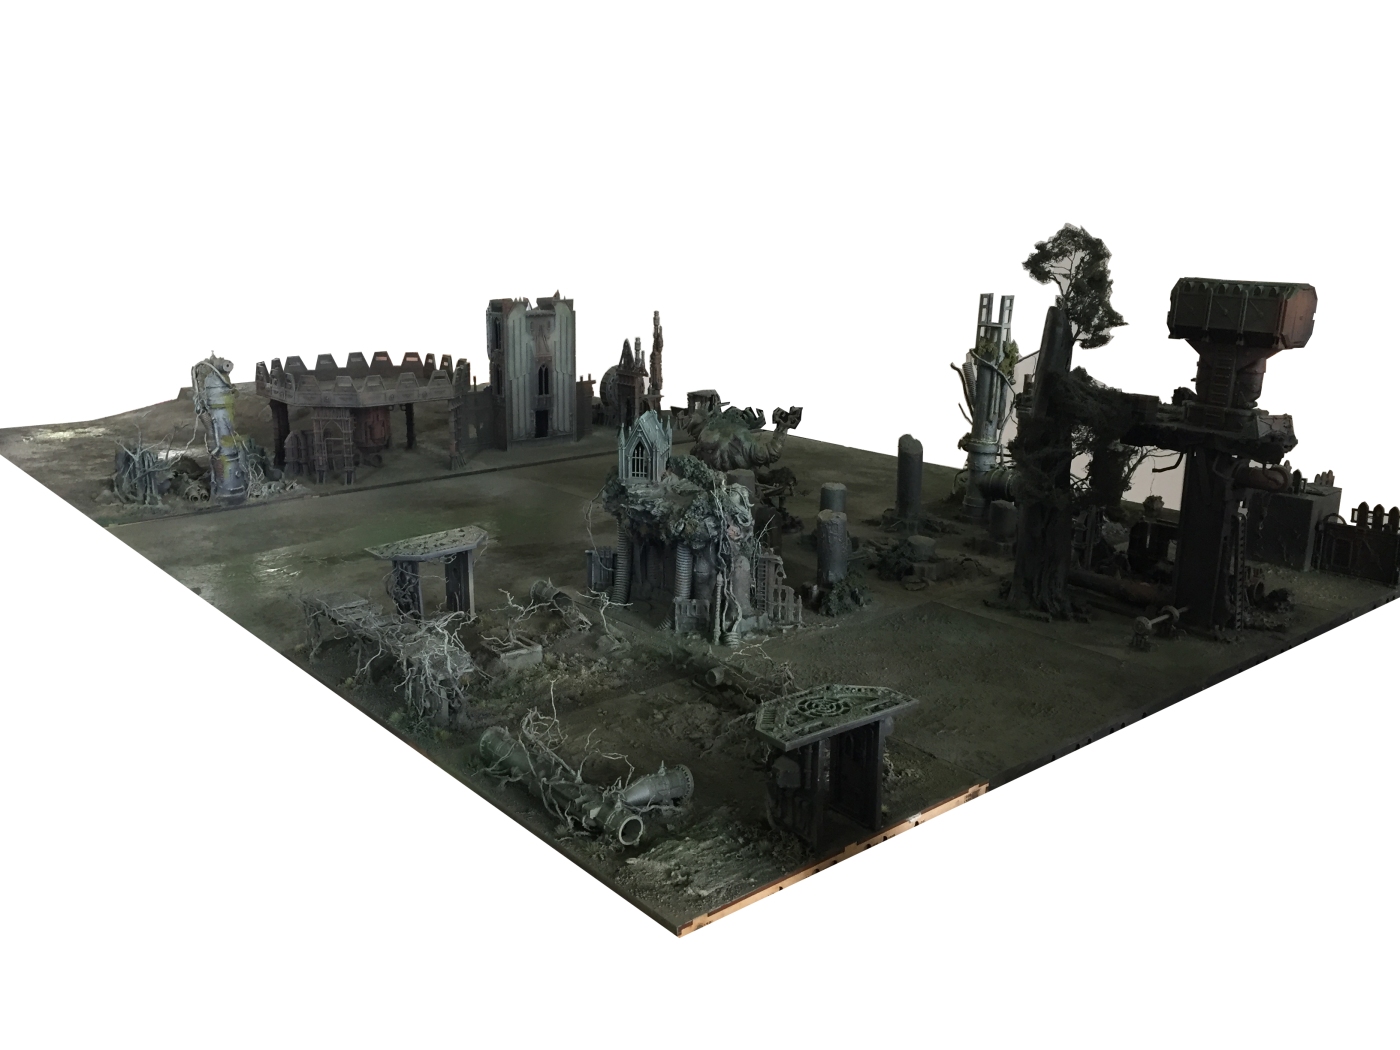
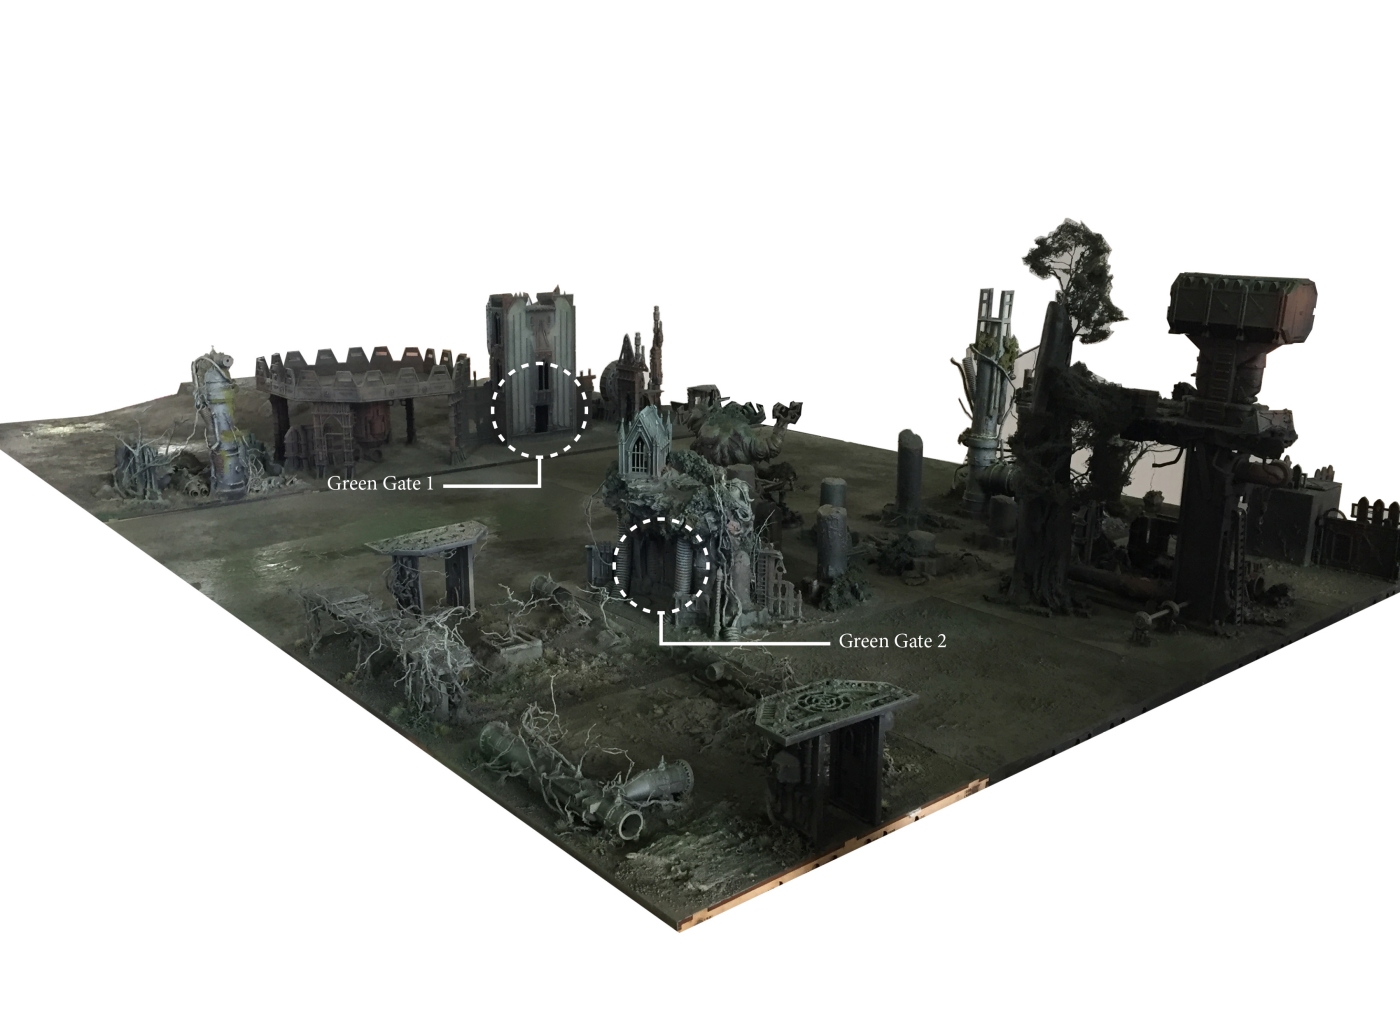
One front (table 1, depicted above) was played out on the verdant surface of Gheal where the defenders, made up of the combined might of the Alpha and Crataegus Legion, tried to prevent the extirpretation crusaders of House Akhum, a Death Company, a host of Space Wolves and a small armada of Imperial Knights from getting through the massive Green Gates that led vertically down into the labyrinthine and bio-mechanical depths of Gheal itself (table 2, depicted below).

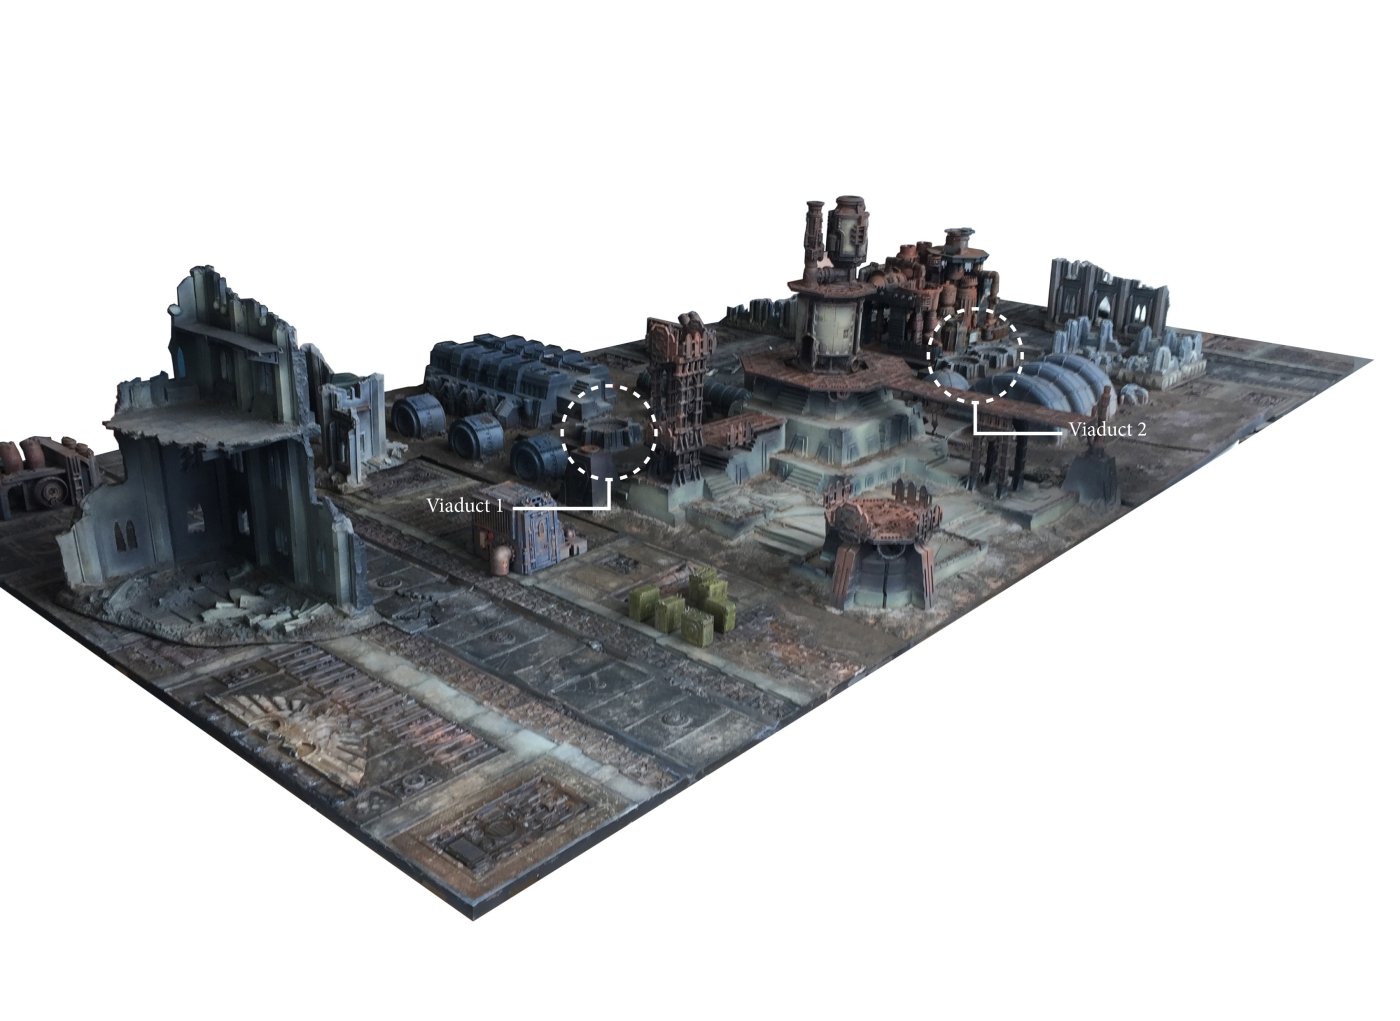
The other front (table 2, depicted above) was played out deep underneath the Green Gates in the boreal Halls and Holloways of Gheal. Here the entrenched defenders, made up of Red Corsairs, the Crataegus Legion together with a surprising ally, led a counter attack against the massive onslaught of the Space Wolves, who where aided by the Golden Hammer of the Emperors Custodes and a host of Imperial Knights.
+++


Table 1 included some of the stunning verdant Thorn Moons terrain made by Migs, Kari, Jakob and Stefan (FPOA), some of which was sent to the States beforehand so that it was ready for the Thorn Moons Crusade.
Table 2 included the main objective, the Viridis Clavem, the key to the Library Moon of Daerwynne and the Daerwynne Palimpsest itself. The key goal of the attacking forces was to discover the key – in the form of a verdant creature hidden somewhere deep inside Gheal. The key goal of the defenders was to make sure that the Viridis Clavem did not get in the hands of the enemies before a certain time.

Like the root system of a bio-mechanical tree the two tables were interconnected via two Green Gates on the surface of Gheal and two vertical ‘viaducts’ with entrance platforms deep down in its core below.
+++
All games were fought using the new 8th edition with its mightily improved rules and game flow, which allow for quick and entertaining fights! But this massive final, cataclysmic game – across two tables that were interconnected vertically – was almost like playing a massive game of Necromunda too.

Absolutely stunning work – beautiful to see!
LikeLiked by 1 person
The Gates and Viaducts between the two tables is a smart feature. A lot of tactical possibilities there. Very cool.
LikeLiked by 1 person
Games for you folks to remember for all time, amazing, thanks for sharing.
LikeLiked by 2 people
So good to see a recap of this awesome hobby weekend! Thanks for taking the time to put thoughts and words onto this hobby adventure.
LikeLiked by 1 person
Wow that is great. SDimply stunning in fact. I love that the tables are joined vertically.
Cheers,
Pete.
LikeLiked by 1 person
This is truly enchanting terrain, and the Crusade write-up is fantastic. I apologise for lowering this to the level of the prosaic – but if you could tell me how the trees/foliage/branches were made, I’d be much indebted.
LikeLike