Miniatures guru and painter extra-ordinaire Jakob Rune Nielsen is slaving away on some of the terrain for the Thorn Moons Crusade! And we are so fortunate to be able to share with you a step by step guide to some of his recent Thorn Moons Crusade Objective Counters!
Without further ado, over to Jakob:
1
B/W mood picture. Actually, this is a close-up of the terrain while being built with an unused part from the Pilgrym terrain in the background. Everything finds its use along the hobby path…

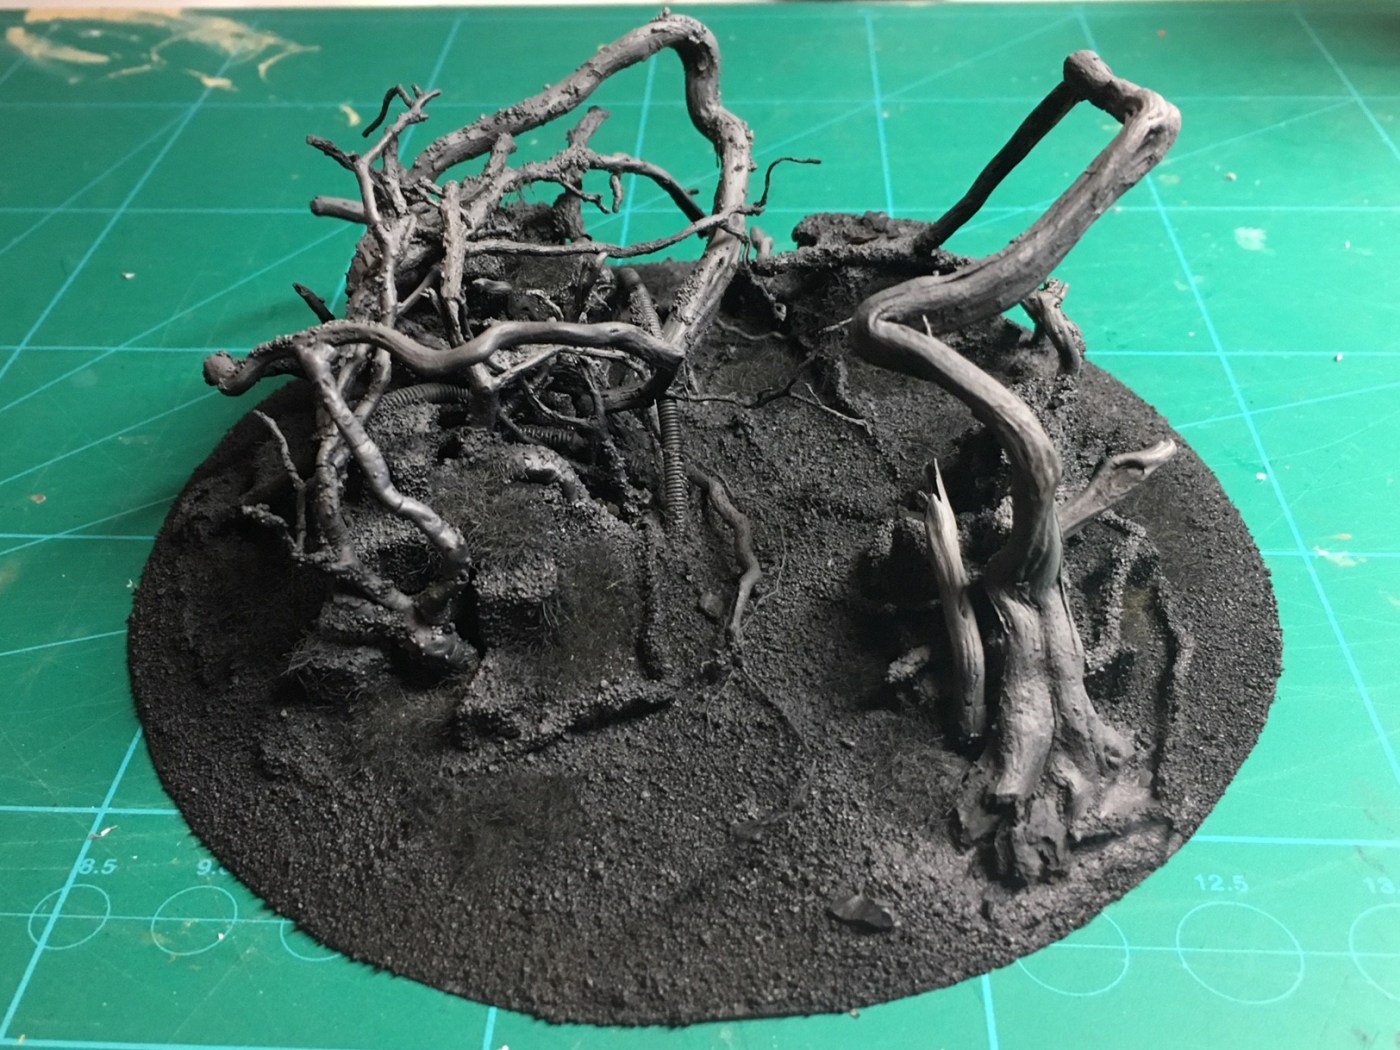
2
Pre-primer image showing the various materials. This objective marker has been built up using a mix of tree roots, sand, static grass, wood chips, and bass guitar strings!

3
Black primer + followed by a quick session of black using the airbrush.

4
First layer of paint: A warm grey from Coat d’Arms called Field Grey, 502. I believe you could use Ushabti Bone from the Citadel range to similar effect. Airbrush the paint onto the branches from a zenith angle and get some spray onto selected areas of the layers in the terrain. Leave some darker patches also for variation. (If you have not got an airbrush then do not despair, but just drybrush the grey carefully onto the model. Use a big soft brush from the DIY store for this.)
5
A careful drybrush using the grey from before adding a little white to the mix. Go over the branches and pick out detailing also drybrush some areas on the sand and grass. Notice how the drybrush goes onto the textures in a very different way than the first layer of airbrushing. Also, pick out any metal bits using a regular metallic mid-tone (boltgun, chainmail).

6 – 7
Now the magic begins. MIG weathering powders. I have used Industrial City Dirt (P039), and African Earth (P038). You do not need a lot, but these powders really add that realistic touch to the terrain. (For my Aeldari bases I just use Industrial City Dirt and then sponge on white flex of paint around the edge of the base. Simple and effective.)


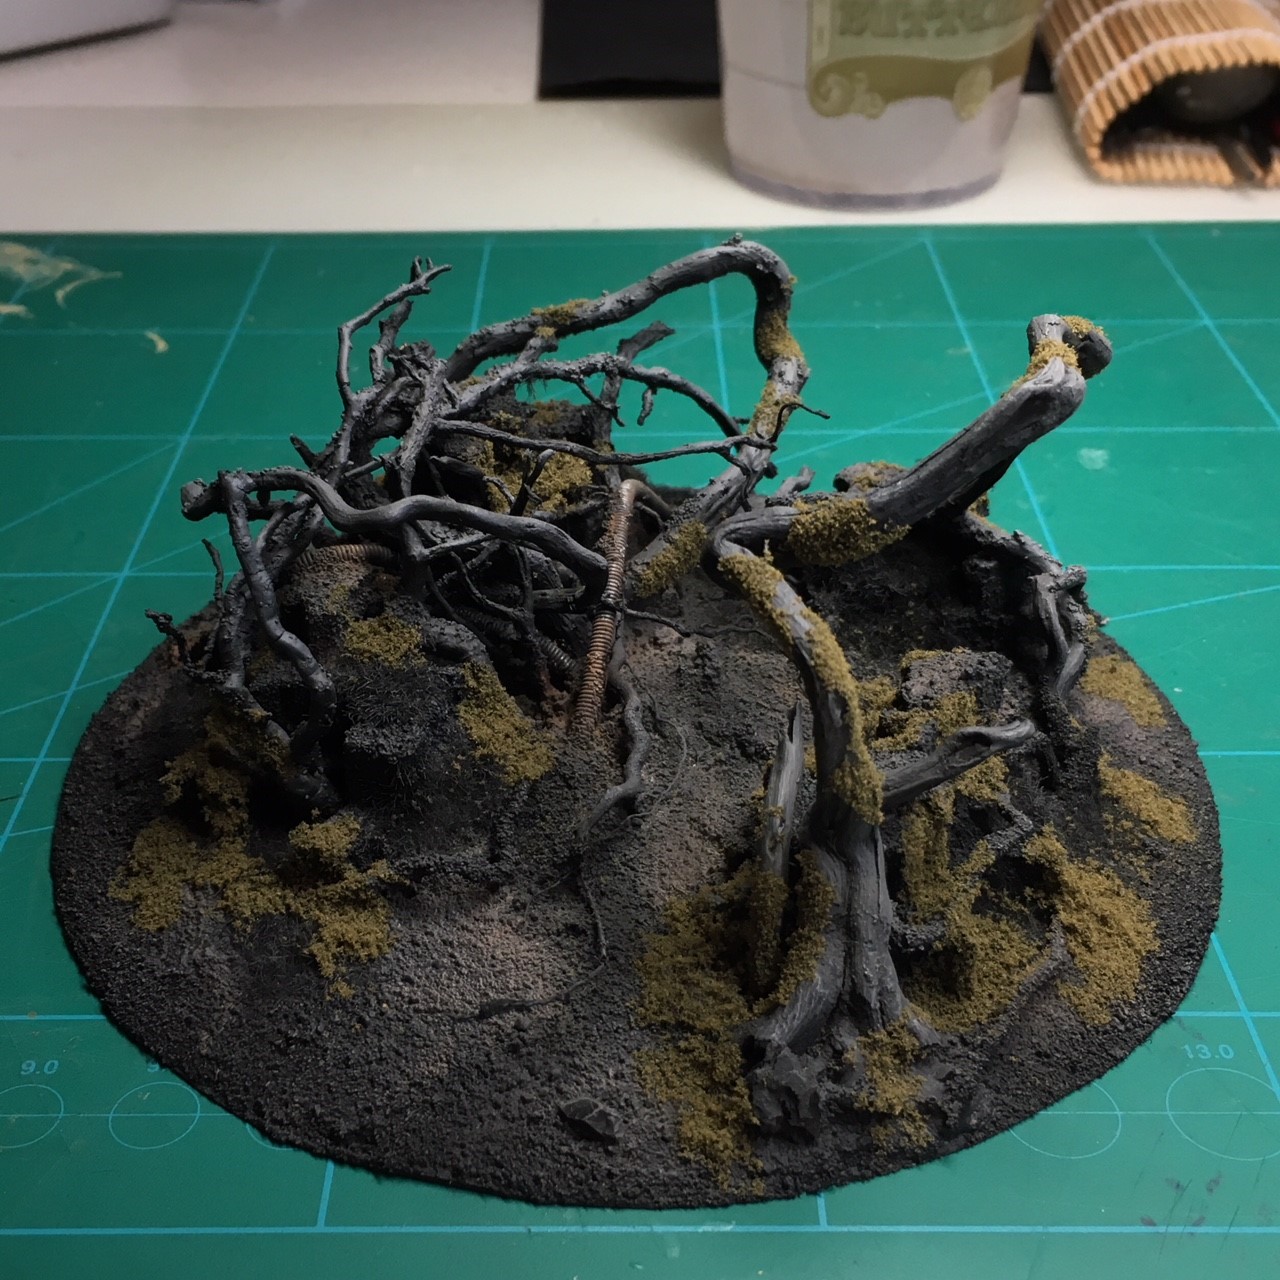
8
A touch of green. Some fine olive green flock added using regular wood glue.
Maybe we need to do some final alignment on the level of growth and green for the Thorne Moons board but serving as a base to work from I think this small step by step will be handy for both the Throne Moons Crusaders as well as fellow hobbyists out there.
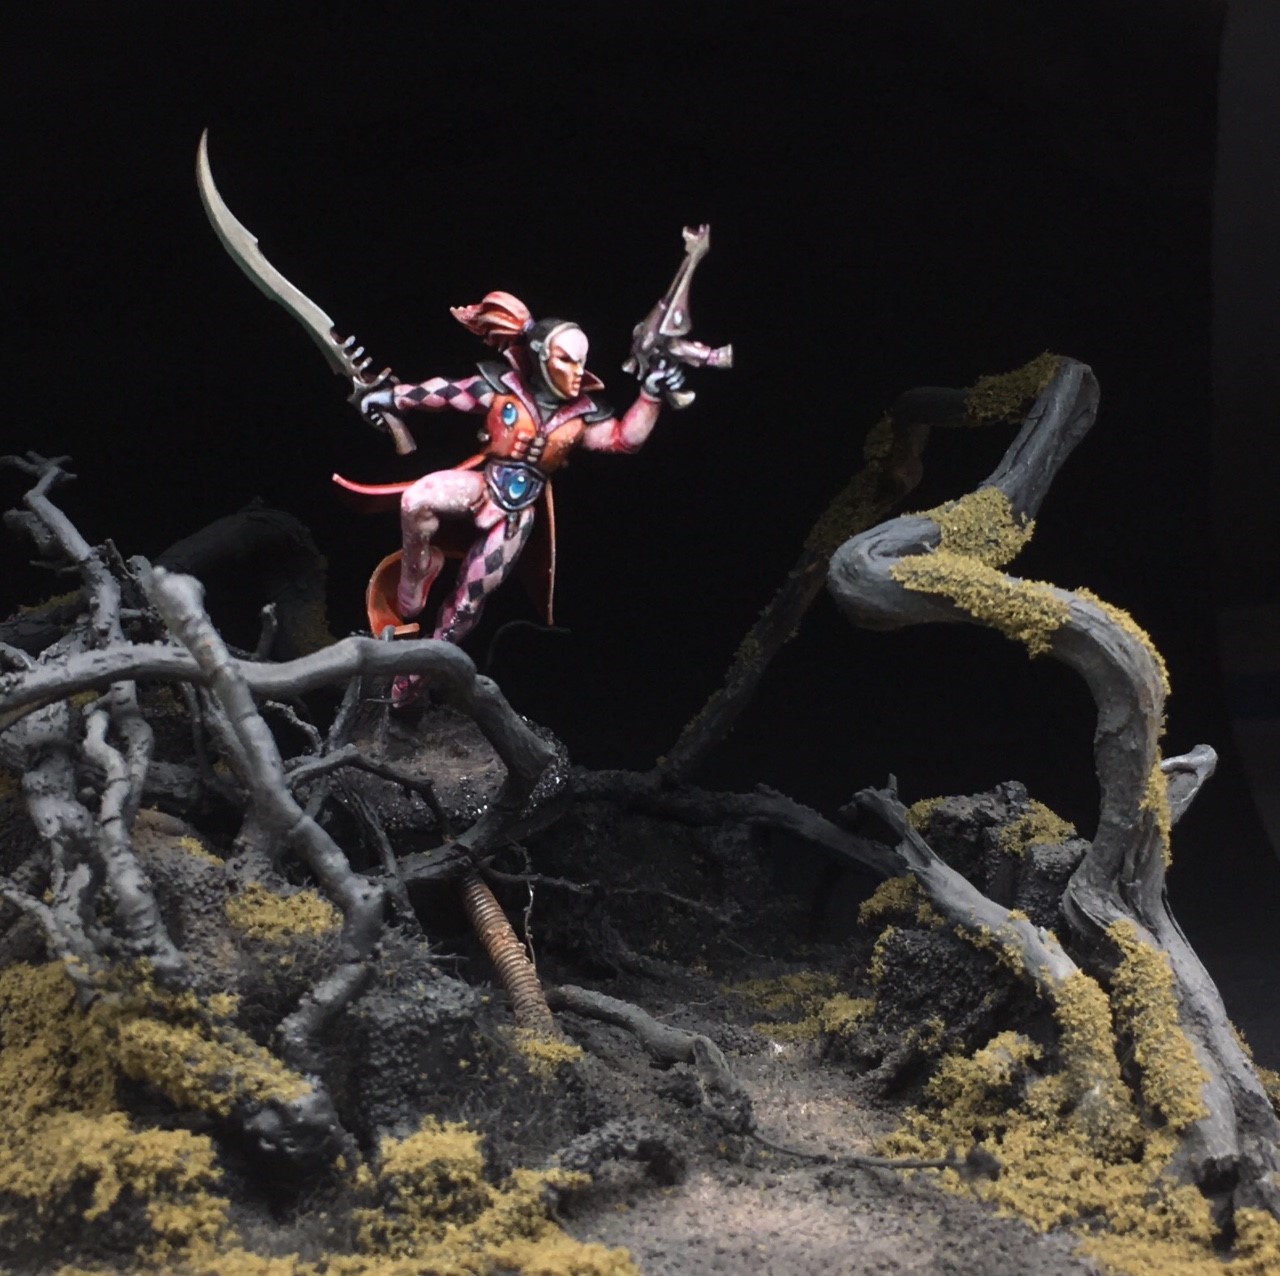
9
To finish off; a mood picture showcasing the terrain: A lone Harlequin sprinting through the growth. Red and green popping great against a moody dark base.


Excellent to have you starting this important step in defining the setting, Jakob. Some if the stuff you used is going straight to my shopping list. Bass string is such a great detail. Tells volumes about the history of technology vs. nature!
LikeLiked by 1 person
Excellent, and thank you for the step-by-step–useful and shows how simple techniques can be so effective when combined and used well.
LikeLike
Fantastic
LikeLike
A great, simple and cheap way to create evocative terrain mate! Thanks for sharing 🙂
LikeLike
Lovely work
LikeLike
Ah, those wonderfully twisted shapes brings back fond memories of making terrain from heather roots years ago. All those weird shapes it makes really evokes a warp-touched forest. Good work indeed – and you may have just inspired me to make some more myself (there’s a joke about getting back to my roots in there somewhere…)
LikeLiked by 1 person